Last updated: 7/5/26
Yes, in many cases you absolutely can lay hybrid flooring over tiles. But the biggest thing that determines whether the floor performs well long term is not the grout lines. It is how flat and level the tiled floor is underneath.
I’ve seen plenty of tiled floors that looked perfectly fine until a straight edge went across them. Suddenly the slab has more dips than a BMX track. That’s where problems start. Floating floors like hybrid, laminate and timber flooring do not like uneven surfaces, especially sharp height changes between tiles.
The good news is that many modern tiled floors are actually excellent candidates for hybrid flooring overlays. Newer rectified tiles are often laid very flat using levelling clip systems, which can make them ideal to go over. Older cushion-edge tiles and poorly laid DIY tile jobs usually need a lot more caution.
One thing that surprises a lot of people is that grout lines are rarely the real issue. In most cases, hybrid flooring can comfortably bridge minor grout joints and small divots. The bigger danger is tile lippage or unsupported sections underneath the floor, which can place stress on the locking system over time.
In this guide, we’ll explain:
- when you can safely lay hybrid flooring over tiles
- which tiled floors are risky
- how to check if your floor is level enough
- what tools to use
- and the most common mistakes people make before installation
Quick Summary
- Yes, you can usually lay hybrid flooring over tiles
- The floor must be flat and level within the product’s tolerance
- Grout lines are rarely the main issue
- Sharp tile lippage is far more dangerous than gradual unevenness
- Rectified tiles are often better suited for overlays
- Older cushion-edge tiles need more caution
- A straight edge is the best way to check a tiled floor
- If the tiled floor is uneven, you may still need grinding or levelling compound
What Actually Matters More Than Grout Lines
One of the biggest misconceptions I hear is people worrying about grout lines telegraphing through the floor. In reality, grout lines are usually not the problem.
Most hybrid flooring products can comfortably bridge standard grout joints and small divots because the boards distribute weight across the surface. Minor grout recesses generally do not create enough pressure to deform the product.
The real danger is uneven tiles.
If one tile sits higher than the next, you create unsupported pressure points underneath the floating floor. Over time, that extra stress gets transferred into the locking system. That is where you start hearing clicks, movement and joint failure.
Floors are meant to be lived on. They are not designed to bridge sharp drops between tiles forever.

Does My Existing Floor Need to be Perfectly Even for Installation?
An even surface ensures a successful installation and a long-lasting floor. The Australian standard is no more than 3mm deviation across 1m of space. This means that if you put a straight edge across a floor, and there is at any point 3mm or more of space visible between the edge and the floor, you are outside of the required tolerance.
Additionally, while this is the Australian standard, many manufacturers have tighter standards, and the manufacturer’s standard always has precedence over the Australian standard. While the product may not be affected by this amount of unevenness in the subfloor, you should not deviate from the Manufacturer’s requirements as if there is a problem with the product as a result of this, your warranty will be voided.
There are two kinds of uneven floors I see all the time.
- The first is gradual movement across the slab where the floor slowly rises and falls over distance. Some hybrid floors can tolerate small amounts of this depending on the product and the manufacturer’s tolerance.
- The second, and far more dangerous problem, is sudden height changes between tiles. This is where one tile edge sits noticeably higher than the next. That sharp tile lippage creates unsupported pressure points underneath the flooring. Every step places stress into the locking system, and over time that can lead to movement, noise or joint failure.
In most cases, sharp drops between tiles are far more dangerous than gentle rolling unevenness.
This is generally caused by an uneven subfloor beneath a tile. As the tiles are straight, but the subfloor is not, ‘plates’ are created due to having to lie the tile on its point of balance, which is generally the centre of the tile.This portion of the tile touches the floor, but the other parts may not, and are filled by the liquid adhesive that sets hard. A skilled tiler can sometimes control this ‘roll’ in the floor, and keep edges to a minimum. However during boom periods when work is aplenty, sometimes good tilers are not on the job, and the cowboys sneak in.
Let Me Explain Why This Matters So Much
With any floated floor, whether it is hybrid, laminate or timber, the product hates uneven surfaces. Especially sudden height changes between tiles. A gradual rise and fall across the slab is often less dangerous than sharp tile lippage where one tile edge sits noticeably higher than the next.
Those sharp drops create unsupported sections underneath the flooring, which places constant stress on the locking system every time someone walks across it.

Expert Insights From Dean Billett
28+ Years of flooring industry experience
If ceramic tiles are level and the grout is less than 3mm deep, you can lay flooring straight over the top. Some smaller ceramic tiles can have very wide and deep grouts that need to be filled and levelled with the tiles.
Not all tiles are level, so using a 3-meter straight edge is essential to test this. Products like self-levelling compounds can be used without primer to go straight over tiles to level out areas.
Another thing to consider is that initially, when tiles were laid, the skirting was laid on the concrete and can be very hard to pull out and replace. Scotia can be used if they are too hard to remove, but it doesn't look as nice.
How To Tell If Your Tiled Floor Is Too Uneven
Here’s the tricky part.
A lot of uneven tiled floors do not actually look uneven until you properly check them.
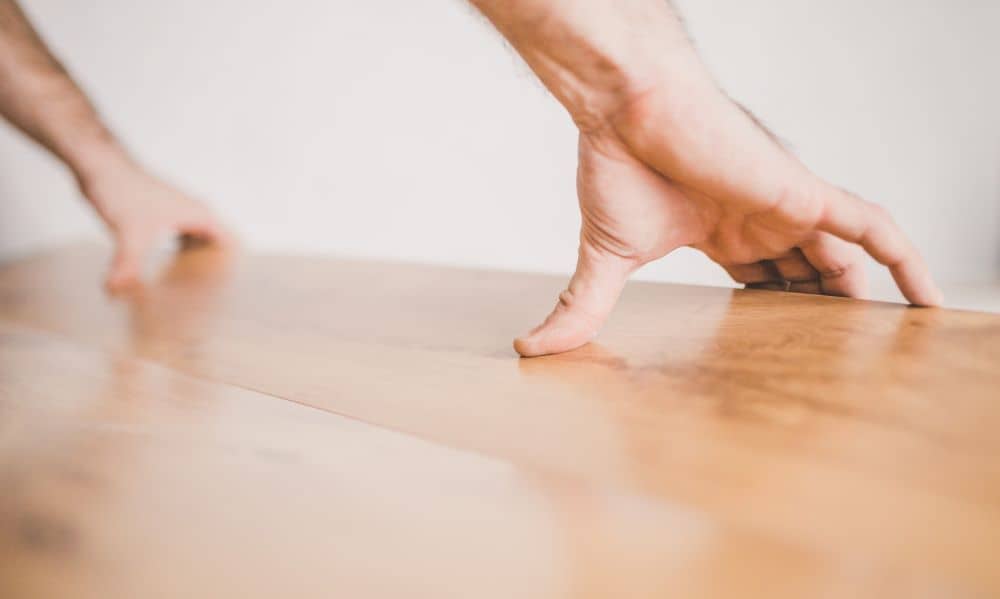
I’ve seen floors that looked perfectly fine from standing height, then you throw a straight edge across them and suddenly the slab has more dips than a BMX track.
Sometimes the clues are subtle.
- tables rocking slightly
- chairs wobbling
- sharp tile lips catching your feet
- corners sticking up between tiles
- hollow-feeling sections underfoot
One of the easiest DIY checks is simply walking barefoot across the floor. If you can noticeably feel sharp tile edges or lips between tiles, your floating floor will probably feel them too.
But the best way to properly check the floor is with a straight edge.
How Can I Make Sure My Subfloor is Level?
The best tool you can use is a straight edge. Ideally, a two metre straight edge gives the clearest picture of how flat the floor really is. But even a decent spirit level can help give you a pretty good indication. The goal is to identify high points, low points and sudden drops between tiles before the flooring goes down.
These include:
- Search for areas of your floor that look uneven.
- Run a straight edge around your floor and look for areas where the straight edge rocks on a high point or sits between 2 high points.
- Drop to eye level and look to see if there is any space between the floor and your straight edge. If you can, you have located a ‘Valley’.
- Tap one end of the meter stick. If it moves up and down freely, you have found a ‘Mountain’.
One thing people often miss is that they only check a tiny section of the floor. That can be dangerous.
A floor might look perfectly fine in one corner of the room, then have major dips or sharp tile lippage elsewhere. The best approach is to check the entire floor in multiple directions using the longest straight edge you can reasonably get your hands on. Ideally, a two metre straight edge is best. But for most DIY installers, even a decent spirit level can still give you a pretty good indication. I used to carry one in the back of the car all the time when I was inspecting jobs.
One of the easiest ways to identify high points is when the straight edge rocks. If you can press one side down and the other lifts, you’ve probably found a high spot.
On the other hand, if both ends are touching the floor but you can see visible light underneath the middle, you’ve likely found a low spot or dip.
Once you have identified the high points and low points, you must decide on how to deal with them. If you have high points, for example, tile corners that protrude up above the mean floor level, it may be a case of simply grinding these areas flat. If however, you find low points, you may feel that it is better to fill these areas with a floor levelling compound. However, if the rectification required is major, it is probably best to bite the bullet and engage the services of a floor preparation specialist.
How Much Unevenness Is Too Much?
If you can physically feel a noticeable lip between tiles underfoot, there’s a good chance the floor needs preparation before installing hybrid flooring. One of the easiest ways to test this properly is with small plastic packers or spacers. You can buy one, two and three millimetre packers from most hardware stores.
If a two or three millimetre spacer slides underneath your straight edge in problem areas, there’s a strong chance the floor is outside tolerance. This becomes especially important around sharp tile edges and sudden drop-offs between tiles.
Because once the flooring is installed, those unsupported sections place constant stress on the locking system every time someone walks across the floor.
That’s usually when failures start appearing later.
Which Tiles Are Usually Safe To Go Over?
Generally speaking, newer rectified tiles are often the safest option for hybrid flooring overlays. Rectified simply means the tiles have very square, consistent edges and are usually installed flatter using levelling clip systems.
In many cases, these floors are excellent candidates for overlays. The ones that usually make me more cautious are older cushion-edge tiles or badly installed DIY tile jobs. If only I had a dollar for every time I walked onto a tiled floor that looked fine until you actually checked it properly. Some DIY tile jobs can have sharp lips between tiles that absolutely punish floating floors over time.
That is why the tile itself matters less than the flatness of the overall floor.
What’s the Most Common Mistake People Make?
The biggest mistake people make when laying hybrid flooring over tiles is simple. They do not actually check the floor properly.
I’ve seen people spend thousands on flooring, underlay and installation, then skip the most important part of the whole job because the tiles “look flat enough”. They grab a tiny spirit level, check one section of the room, then assume the whole floor is fine.
Don’t make that mistake.
The best thing you can do is use the longest straight edge possible and check multiple directions across the floor. A lot of problems only show up when you run a straight edge across the tile joins.
And here’s the thing.
Sometimes the floor underneath the tile is actually the real problem. The tile simply follows the contour of the slab underneath it. So even if the tile looks decent at first glance, the floor beneath may still have major movement or height changes.
When Is Grinding Enough On Its Own?
If the problem is mainly a few isolated high points or sharp tile edges, grinding is often enough on its own. In many cases, professional floor prep crews will identify and mark the high spots first before deciding whether levelling compound is even necessary.
I’ve seen crews walk through an entire house marking problem areas with a marker before grinding down the sections that were sitting proud.
That approach can save a huge amount of unnecessary levelling compound.
Because here’s the thing.
Levelling compound has to come up to the highest point of the floor.
So if you have one small section sticking up, you may end up using compound across the entire room just to match that height. Across a large floor area, that can become extremely expensive very quickly. Sometimes it makes far more sense to simply grind down the high spots first.
Does The Advice Change Between Hybrid, Laminate And Vinyl Plank?
Yes, absolutely. Different flooring products behave very differently over tiles.
Hybrid flooring can usually bridge minor grout lines reasonably well because of its rigid core construction. Laminate flooring is often even stronger again through the joints. Vinyl plank, however, is a completely different situation.
In many vinyl plank installations, grout joints underneath the floor need to be filled or skim coated first. Otherwise the grout lines can eventually telegraph through the surface over time.
That’s why you should never assume the same preparation advice applies to every flooring product. Always follow the manufacturer’s installation instructions for the specific floor you are installing.
When Is DIY Installation Realistic?
If your tiled floor is genuinely flat and within tolerance, a confident DIY installer can absolutely install hybrid flooring successfully. But if the floor feels like a minefield of lips, hollow spots and uneven tile edges, it’s usually smarter to engage a professional floor preparation crew first.
Honestly, some prep crews are incredible at what they do. I’ve seen teams completely transform difficult floors in a day or two simply because they had the right grinding equipment, levelling products and experience.
The installation itself is often the easy part. The floor preparation is where most problems are won or lost.
When Is It Better To Remove The Tiles Completely?
Sometimes it absolutely makes sense to leave the tiles in place and install over the top. Other times, removing the tiles completely is the smarter long-term option. One of the biggest things to consider is floor height.
Every layer you add over the top raises the finished floor height higher and higher. Older homes that have already had tiles installed over previous flooring can sometimes end up with massive height differences between rooms.
I still remember my dad retiling the same bathroom multiple times over the years. Eventually the floor became so high there were noticeable drop-offs into the hallway. That’s the kind of thing you need to think about before committing to another overlay.
In some cases, especially where there are multiple flooring layers already in place, it can actually make more sense to strip everything back and start fresh.
Because even if you remove the tiles, the slab underneath may still need grinding or levelling anyway.
So the decision usually comes down to:
- overall floor height
- condition of the tiles
- condition of the slab underneath
- transition heights into other rooms
- and what level of finish you are prepared to live with
Can You Lay Hybrid Flooring Over Cracked Tiles?
Best practice is generally not to install over cracked tiles. That said, not all cracks are equal.
Hairline cracks caused by minor slab movement are very different from loose or shattered tiles that are actively moving underneath the floor.
I’ve worked on floors where tiles were cracked badly enough that large sections could actually be lifted out by hand. In those situations, the important thing is making sure the floor underneath remains properly supported before the hybrid flooring goes down.
Sometimes that means:
- re-securing loose tile sections
- replacing broken pieces
- using levelling compound
- or grinding and prepping the area properly first
The key is that the floor underneath must remain solid, stable and supported.
If there is movement underneath the floor, the stress eventually transfers into the joints of the floating floor over time.
What Is The Biggest Myth About Laying Flooring Over Tiles?
Probably the biggest myth is people assuming the floor is “probably fine” without properly checking it. I’ve seen plenty of tiled floors that looked perfectly acceptable until a straight edge went across them.
The other big myth is that every grout line needs to be filled before installing hybrid flooring.
In reality, standard grout joints are usually not the problem.
The bigger issue is almost always:
- tile lippage
- unsupported sections
- sharp height changes
- and poor floor preparation
That’s what usually causes problems later.
Frequently Asked Questions About Installing Flooring Over Tiles
In most cases, yes, it is a very good idea.
Especially over concrete subfloors. Even though serious moisture-related issues are relatively uncommon, the cost of adding a builder’s plastic moisture barrier underneath the floor is usually tiny compared to the cost of fixing a failed floor later.
For a relatively small cost, plastic sheeting can help provide additional protection against moisture-related problems and silica hydrolysis issues in certain situations.
If you have any doubt at all about moisture coming through the slab, it is usually better to play it safe.
This depends entirely on the flooring product. For hybrid flooring, the answer is generally no.
Most hybrid flooring products already have their own integrated underlay system or specific installation requirements. Adding another underlay underneath can actually create too much movement in the floor and place additional stress on the locking system.
Laminate and timber flooring are different. Those products often do require a separate underlay depending on the installation system being used.
Always follow the manufacturer’s installation instructions for the specific product you are installing.
This is a VERY good search intent section.
Yes, you can. But it depends on how the original tiles and skirting were installed.
In some homes, the tiles have been installed hard up against the skirting boards, which can make removing the skirting difficult without damaging it.
In those situations, some people choose to:
- replace the skirting completely
- undercut sections
- or install scotia trim instead
That decision usually comes down to:
- the finish you want
- your budget
- and how much additional work you are prepared to do
This section helps capture a LOT of renovation-intent searches.
Yes, and here's why: your eyes can play tricks on you! What looks perfectly level from standing height can actually be more like a BMX track when you get down there with a straight edge. I've seen many DIYers skip this step only to run into problems later. It's worth spending that extra hour checking thoroughly rather than discovering issues after you've laid your new flooring.
Without a doubt, it's underestimating those pesky tile-to-tile height differences. While many DIYers worry about wide grout lines (which are actually less problematic than you'd think), it's those subtle height variations between tiles that can really cause trouble. Even a 3mm difference might seem tiny, but it can create what we call a 'dropping intolerance' that puts stress on your new flooring's joins over time.
Not necessarily! If you're dealing with just a few high points like proud tile corners; you might be able to handle the grinding yourself. However, if you discover significant low points or valleys across larger areas, that's when I'd recommend calling in a floor preparation specialist. Remember, a little professional help at the start can save you from bigger headaches down the track.
While self-leveling compounds are brilliant products, they're not a one-size-fits-all solution. You can use them without primer over most tiles, but you'll want to make sure your tiles are well-bonded to the subfloor first. Give your tiles a good tap and if you hear any hollow sounds, you'll need to address those loose tiles before even thinking about pouring any leveling compound.