How do you clean engineered hardwood floors? The short answer is sweep or vacuum daily, damp-mop (never wet) with a pH-neutral cleaner, and avoid steam or harsh chemicals. That’s 80% of the job done.
Now, the longer answer, and where experience counts. Engineered timber features a real wood veneer over a stable core. Treat it like real timber because it is. I’ve seen it all: floors flooded with a sopping mop, vinegar “hacks” that dull the finish, and chairs scraping around without felt pads. Don’t make my mistake; years ago, I thought “a quick steam will lift the grime.” It lifted the veneer instead. Floors are meant to be lived on, but they still need the proper habits to stay sharp.
Quick Summary
- Sweep or vacuum daily with a soft-bristle or hard-floor head to prevent grit from scratching the surface.
- Damp mop only: floors should dry in under 15 seconds.
- Use a pH-neutral timber cleaner (Bona is a safe go-to).
- No steam mops: heat + moisture = delamination.
- Protect high-traffic areas with mats/runners; fit felt pads under furniture.
- Wipe spills immediately: never let water sit.
- Keep indoor humidity 40–60%; limit direct sun to prevent fading/movement.
- Refinish lightly when needed (depends on veneer thickness) and keep spare boards for repairs.
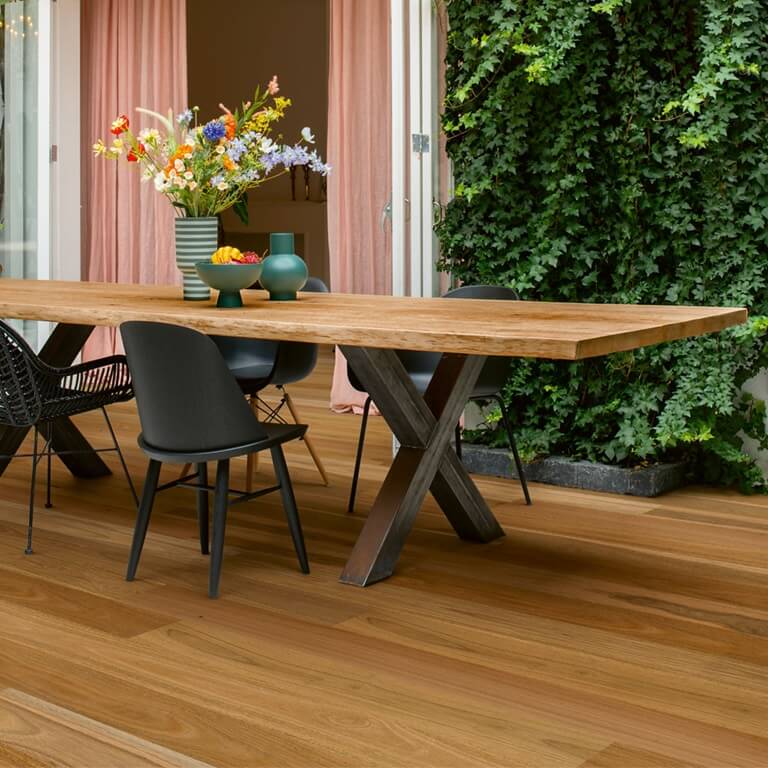
Empire OZ Engineered Timber Blackbutt Rustic
Understand Your Engineered Timber Floor
Engineered hardwood vs engineered oak
Both are real timber on top, just different species. “Engineered hardwood” in Australia usually means a local favourite like Spotted Gum or Blackbutt; “engineered oak” is typically European oak or American oak. Oak is a touch softer, so be extra kind with soft-bristled brooms and microfibre mops to avoid dulling the finish.
Engineered timber vs water & moisture
Here’s the thing: engineered timber is more stable than solid timber, but it’s not waterproof flooring. Excess moisture causes edge swelling, cupping and lifted joints.
The golden rules:
- Never flood mop. Wring the mop until it’s only just damp.
- Wipe spills straight away. Don’t give water time to creep into joins.
- No steam cleaners. It’s a hard no from me, even with my industry experience.
Some modern constructions like Premium Floors Quick-Step Cascada handle incidental moisture better, but your day-to-day care shouldn’t change: keep water to a minimum and you’ll avoid headaches.
Expert Insights From Levi Saunders
Online Retail Specialist & Flooring Content Creator
Acclimatising Timber Floors
If you’re planning to lay engineered flooring soon, make sure you’ve read our guide to acclimatising your timber floor so you understand the importance of letting the product “breathe” out side the box for a period of time before installing.
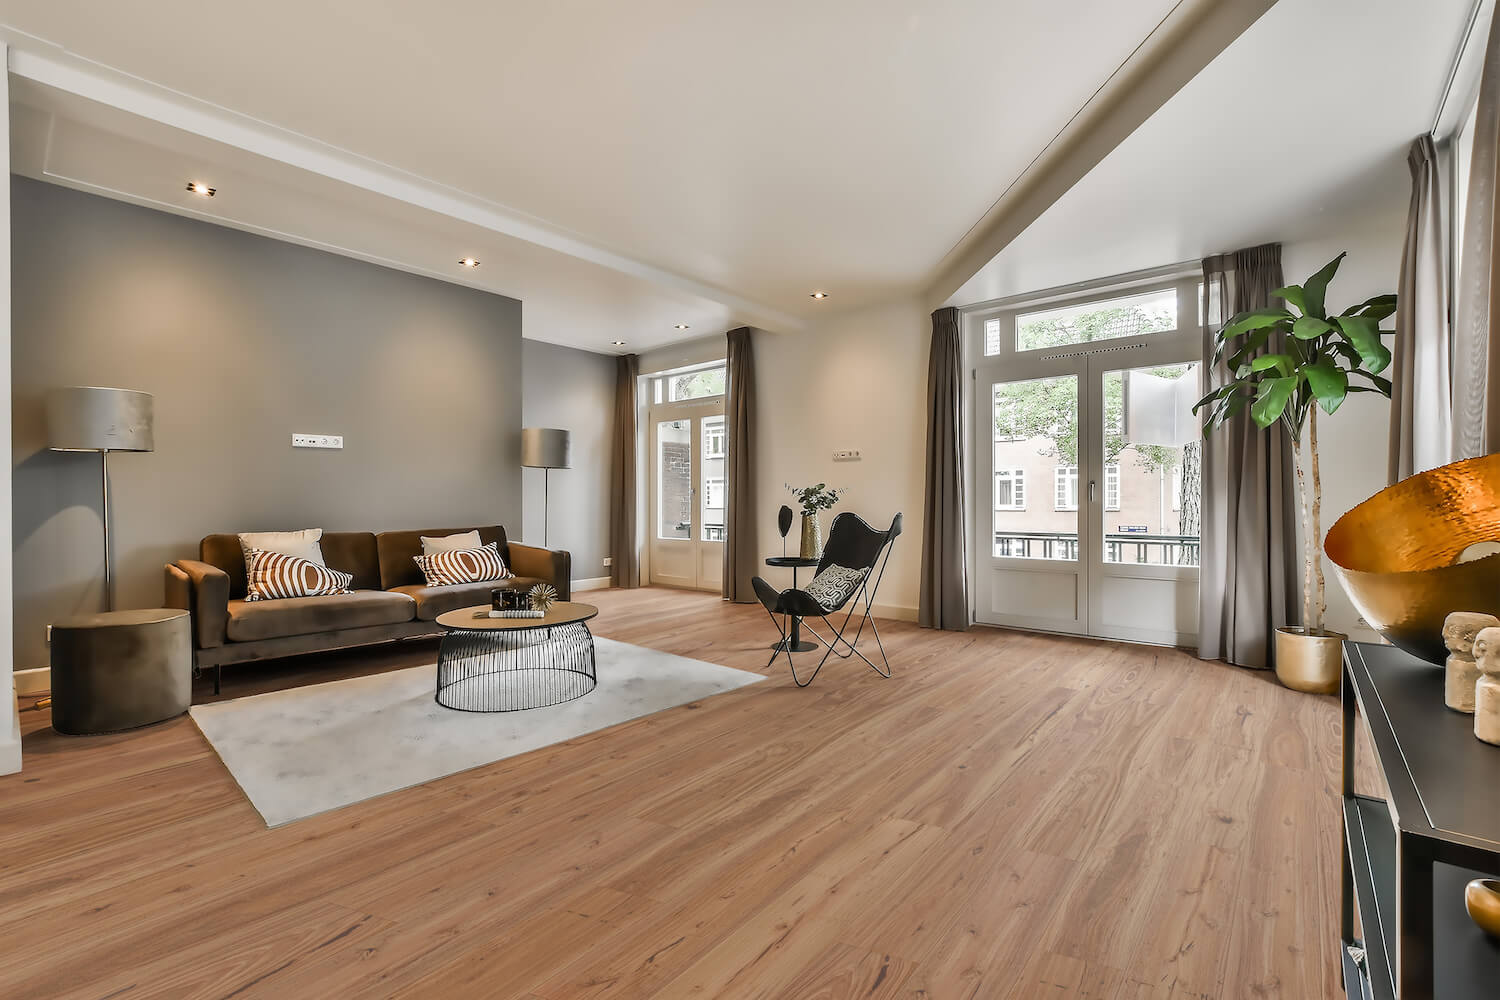
Australian Select Timbers Hickory Impression Homestead
Preventive Maintenance – The Secret to Longevity
When it comes to cleaning engineered hardwood floors, the best results actually come from what you don’t let happen in the first place. Prevention beats repair every time. I’ve seen homes where a ten-year-old engineered floor still looks brand new, and others where it’s worn down within two. The difference isn’t the product; it’s how it’s treated day to day.
So here’s how to stop scratches, scuffs, and swelling before they ever start.
Use Mats, Rugs and Runners in the Right Spots
If you only take one thing away from this guide, let it be this: stop grit at the door. Every bit of sand or dirt you walk inside acts like fine-grain sandpaper.
- Place a coarse outdoor mat at each entrance — this catches the heavy dirt.
- Inside, follow up with a softer mat or runner to trap finer dust.
- In high-traffic zones (hallways, kitchens, living areas), add rugs or washable runners to protect your finish.
Don’t skip the rug pads underneath — they stop slipping and protect the coating from friction wear. Go for rugs with breathable backings (not rubber) to prevent moisture trapping underneath.
Fit Felt Pads Under Furniture
This one’s simple, but it saves a world of hurt. Stick felt pads under every furniture leg — chairs, stools, tables, lounges, you name it. Replace them a few times a year or when they flatten out.
Avoid rubber or hard plastic tips; they can scuff or discolour timber under heat and pressure. If you’ve got heavy pieces (like dining sets or pianos), consider furniture sliders for easier, less-gouging movement.
Maintain a Timber-Friendly Environment
- Humidity: Keep between 40–60%. Too dry and boards may gap; too humid and they’ll expand.
- Temperature: Aim for consistency. Big swings (from aircon to open windows) are rough on flooring.
- Sunlight: Direct UV rays fade coatings and dry out timber over time. Use blinds or curtains in areas with strong sunlight.
If your floor ever starts looking dry or grainy despite regular cleaning, it’s often a humidity issue, not dirt.
Avoid Sharp Heels and Pet Claws
- High heels can dent engineered flooring, especially in thinner veneers.
- Pet claws act like miniature chisels when they slip on smooth surfaces.
Keep claws trimmed and heels off the floor when possible. It’s not about being fussy; it’s about saving yourself from refinishing sooner than you should.
Control the Little Details (They Add Up)
- Always lift furniture instead of dragging it.
- Keep a microfibre mop or dust wand near high-traffic areas for quick touch-ups.
- Wipe up food crumbs immediately — they attract moisture and bacteria that can dull coatings.
- Never use rubber-backed mats or rug underlays unless they’re approved for timber; they can stain or stick under heat.
If only I had a dollar for every time someone used a “non-slip” bath mat in the kitchen that melted into their lacquer finish. Once you’ve seen that happen, you’ll never skip rereading the label.
Why Prevention Saves You Time and Money
Here’s the reality: cleaning engineered timber floors the right way doesn’t take long. But repairing them? That’s another story. A proper felt pad costs cents. A rug, maybe a hundred bucks. A professional sand and refinish? Closer to a thousand.
The smartest floor owners I know spend five minutes a day maintaining their space — not five weekends a year trying to fix it.
Cleaning Methods and Products That Actually Work
Now we’re getting into the nitty-gritty – literally. Whether you call it engineered hardwood or engineered timber, cleaning it properly isn’t about expensive products or fancy gadgets. It’s about knowing what helps and what harms.
What to use to clean engineered hardwood floors (the safe kit)
Keep it simple:
- Vacuum with a hard-floor head (no rotating beater).
- Microfibre dust mop for quick daily passes.
- pH-neutral cleaner for weekly mops — water-based, residue-free.
- Two-bucket method: one clean, one dirty, so you’re not re-spreading muck.
- Soft cloths for spot work; avoid scourers and anything abrasive.
Why the routine matters (and how it saves money)
Grit works like sandpaper under shoes. A minute of daily dust control beats hours of “deep cleans” that risk over-wetting. Keep to the light-touch routine and you’ll stretch out the time between light re-coats, and maybe avoid them altogether for years.
The language you’ll see (and what it actually means)
- “Damp mop” = the head is wrung so well that the floor dries in under 15 seconds.
- “pH-neutral” = no vinegar, no ammonia, no oil soaps. These will haze, dull or soften finishes.
- “Timber-friendly environment” = stable humidity 40–60%, ventilation, and sensible sun control. The slab has more dips than a BMX track? Different issue — but movement and pooling water are the enemies of a clean, healthy floor.
Let me show you the routine I’ve used (and taught customers for decades) that keeps these floors looking showroom-ready without overcomplicating things.

Daily and Weekly Cleaning Routine
Sweep or Vacuum Daily
Dust, sand, and grit are your floor’s natural enemies. Every time you walk across them, they grind away at the finish like fine sandpaper.
Use a soft-bristle broom or a vacuum with a hard-floor head – no spinning brushes. Even a small cordless stick vac does the trick if you run it over traffic areas daily. Don’t wait until it “looks dirty.” By the time you can see dust, it’s already scratching.
Dry Mop for Touch-Ups
For light dust or pet hair, a microfibre dust mop is your best mate. Quick, quiet, and easy — just run it in the same direction as your boards. It picks up fine particles that vacuums often miss, especially in between weekly cleans.
Mop Weekly (Lightly)
Here’s where most people go wrong: too much water. The trick is to mop damp, not wet. Your floor should dry within 15 seconds of contact. If it takes longer, your mop’s too wet.
What you’ll need:
- Two buckets: one for the clean solution, one for the rinse water.
- pH-neutral timber floor cleaner (Bona is a safe, proven choice).
- Microfibre mop head – soft, washable, and reusable.
What to do:
- Fill one bucket with diluted cleaner (follow label directions).
- Fill the second with plain water for rinsing.
- Dip the mop, wring it out hard, and mop with the grain of the boards.
- Rinse and wring again after every few passes.
- Let it air-dry—no need to buff or polish.
If only I had a dollar for every time someone flooded their floor thinking it’d “lift the dirt faster.” All that does is lift the veneer.
Deep Cleaning (Without Ruining the Finish)
- Vacuum first.
- Apply a gentle, timber-safe cleaner like Bona Oxy Power Timber Floor Deep Cleaner.
- Use a soft microfibre pad. Avoid abrasive sponges.
- Work in sections, lightly misting and wiping immediately. Don’t let the solution pool.
- Dry with a clean microfibre towel if needed.
No scrubbing. No steaming. No soaking. The less water you use, the longer your coating lasts.
Spot Cleaning and Stain Removal
- Act fast. Blot (don’t rub) with a dry towel.
- Damp-wipe the area using your pH-neutral cleaner.
- Dry it immediately.
- For stubborn stains, refer to your manufacturer’s care guide.
What to Use (and What to Avoid)
| ✅ Safe to Use | ❌ Avoid Like the Plague |
|---|---|
| Soft brooms, microfibre mops | Steam mops |
| pH-neutral timber cleaners | Vinegar, ammonia, bleach |
| Bona or equivalent systems | “Multi-purpose” or wax-based products |
| Slightly damp cloths | Soaking wet mops |
| Two-bucket cleaning system | Reusing dirty water |
Cleaning Frequency Guide
| Task | Frequency | Tools |
|---|---|---|
| Sweep or vacuum | Daily | Soft broom or hard floor vacuum |
| Dry mop | 2–3 times/week | Microfibre dust mop |
| Damp mop | Weekly | Microfibre mop + pH-neutral cleaner |
| Deep clean | Every 2–3 months | Timber floor cleaning kit |
| Spot clean | As needed | Damp cloth + neutral cleaner |
Common Mistakes
- Over-wetting the mop causes swelling and dulling.
- Using vinegar or soap breaks down the finish.
- Steam cleaning: causes delamination (you’ll never get warranty cover).
- Skipping daily dust control: grit causes most visible wear.
- Polishing over dirt: traps grime and makes future cleaning harder.
Cleaning engineered wood floors is meant to be light and regular, not intense and infrequent. The more consistent you are, the easier it gets.
If You Want to Go the Extra Mile
- Robot vacuums: Great for daily dust pickup if they have soft wheels and brushless heads.
- Humidity monitor: Cheap and handy for keeping your home in the timber-safe range.
- Reusable pads: Wash your microfibre mop heads often; dirty pads just smear dirt around.
- Felt floor gliders: Stick them under chairs and stools that move daily.
It’s about building habits, not buying gadgets. Do the right five-minute routine every day, and your floor will age gracefully.
Repairs, Refinishing & Long-Term Care
So you’ve swept, mopped, and cared for your floor like a pro. But even the best-maintained engineered timber floor will cop a few knocks over time. Kids, pets, parties, furniture; they all leave their mark. The trick isn’t to panic or overreact. It’s knowing what can be fixed, when to refinish, and when to call in the cavalry to refinish your floors. To clarify, repairing and replacing damaged floors is a huge topic in itself, so we are only touching on it lightly below.
Let’s finish strong — this is the part most homeowners never get right.
Repairing Scratches, Dents and Damage
Light Surface Scratches
For light scuffs or small scratches, you don’t need to sand or replace anything. Most modern engineered floors have a UV-cured lacquer or hardwearing polyurethane topcoat that can be easily revived with a touch-up product.
- Use a timber repair kit, like those from Konig Australia, to colour-match and fill minor surface marks.
- Apply with a soft cloth or applicator and buff lightly once dry.
- Avoid “home remedies” like olive oil or furniture polish; they’ll just smear and trap dirt.
If you can catch the scratch with your fingernail, it’s probably too deep for a simple polish and may need a professional’s touch.
Deeper Damage (Gouges, Chips or Dents)
- If the top veneer isn’t completely cut through, a light sand and recoat might do it. To be clear, this is a big job though!
- For deep dents or crushed fibres, board replacement may be easier (and cheaper long term).
- Keep spare planks from your installation — they’re gold when you need to patch a damaged section later.
I’ve seen homeowners pull up half a living room just to fix one panel, only to toss their leftovers. Don’t make my mistake; stash a few extras.
Refinishing and Recoating Your Floor
- Thin veneers (under 2mm): One light sand and cutback, max.
- Mid veneers (3–4mm): Up to two sands in a residential space.
- Thick veneers (5–6mm+): Possibly three or four over its lifetime.
Unless you’re very good at DIY, always get a professional floor sander to do it; one bad pass can take your veneer down to the core and ruin the floor.
Once sanded, you can choose to reseal with polyurethane, oil, or UV-cured lacquer, depending on the original finish and desired look.
A note on floated floors and sanding
If your engineered timber floor is floated (not glued down), be careful before booking a sand-and-polish. Floating floors have a thin layer of foam or acoustic underlay beneath them, which allows some vertical movement. The moment a sander hits that, the boards can “bounce” or drum, making it impossible to achieve a flat, even finish. You often end up with swirl marks, chatter lines, or soft spots where the veneer burns or tears.
That’s one of the reasons we strongly recommend direct sticking engineered timber wherever possible. A glued-down floor feels more solid underfoot, performs better acoustically, and importantly, can be safely sanded and refinished later in its life.
If your floor is floated, talk to a professional before sanding. In most cases, a light buff and recoat is safer than a full sand. To weigh up the pros and cons, we recommend reading this article on direct-stuck vs. floated engineered floors.

Expert Insights From Clem Sturgess
20+ years' experience in hard flooring
Keep a record of your floor’s brand and finish. If you ever need recoating, the installer or supplier can recommend the matching coating system.
Replacing Damaged Boards
- Click-lock engineered boards are often replaceable without removing the entire floor.
- Tongue-and-groove systems may require cutting and gluing a replacement piece.
A professional installer can often do this cleanly, especially if you saved a few boards. Replacement avoids uneven sanding, colour mismatch, and unnecessary rework.
Long-Term Care Routine
| Task | Frequency | Purpose |
|---|---|---|
| Sweep/vacuum | Daily | Stops grit scratching finish |
| Damp mop | Weekly | Removes residue & spills |
| Deep clean | Every 2–3 months | Refreshes surface and restores sheen |
| Spot repairs | As needed | Fixes scratches before they spread |
| Professional inspection/recoat | Every 5–10 years | Keeps finish looking fresh |
That might sound like a lot, but most of it becomes second nature. The most significant difference between a five-year-old floor that still looks new and one that doesn’t? Discipline.
What to Avoid (and Why It Matters)
| ❌ Avoid | ⚠️ Why |
|---|---|
| Steam mops | Heat and moisture cause delamination and void warranty. |
| Vinegar, ammonia, or bleach | Harsh chemicals degrade coatings. |
| Wax or oil unless manufacturer-approved | Causes build-up and slipperiness. |
| Dragging heavy furniture | Scratches the veneer beyond repair. |
| Leaving spills | Moisture seeps between boards and swells edges. |
If you’re ever in doubt, assume “less is more.” I’ve seen customers polish over grime, thinking they’re protecting it — when really they’re sealing dirt under a shiny layer. Always clean, dry, then protect.
Engineered Timber vs Hybrid Flooring – A Cleaning Reality Check
| Feature | Engineered Timber | Hybrid Flooring |
|---|---|---|
| Surface | Real wood veneer | Printed wood-look film |
| Waterproofing | Moisture-resistant only | Fully waterproof |
| Cleaning method | Damp mop only | Wet mop safe |
| Repairability | Refinishable | Replace only |
| Lifespan | 20–30 years (with care) | 15–20 years |
Hybrid flooring wins on waterproofing, no doubt. But for warmth, texture, and authenticity, engineered timber flooring still holds its crown. You just need to respect it like the natural product it is.
(Read: Hybrid vs Engineered Timber Flooring)
Final Thoughts
Engineered timber floors don’t demand perfection; they just need respect. Clean lightly, avoid moisture, and protect them from everyday wear, and they’ll serve you beautifully for decades.
I’ve seen too many homeowners think their floors “wore out” when really, they were just misunderstood. The key is consistency over intensity. A few smart habits done often are better than any deep-clean marathon.
If you’ve invested in a good floor, invest the five minutes a day it deserves.
FAQ
What’s the best way to clean engineered hardwood floors?
Vacuum or sweep daily, then damp mop (never wet) with a pH-neutral timber cleaner like Bona Wood Floor Cleaner. Always wring your mop until it’s just damp — the floor should dry in under 15 seconds. Too much water is the fastest way to ruin a beautiful floor.
Can you use a steam mop on engineered timber floors?
It’s a hard no from me, even with my industry experience. Steam forces moisture and heat into the joins, breaking down the adhesive that holds your boards together. It’s one of the quickest ways to lift or swell your veneer — and it’s never covered under warranty.
Can you refinish engineered timber floors?
Yes, depending on the veneer thickness and how the floor’s installed. Thicker veneers can be sanded a few times, but floated floors are risky to sand because they flex on the underlay. That’s one of the reasons I recommend direct-stick installation — it feels firmer, lasts longer, and can be safely refinished later on.
What’s the best cleaner for engineered timber floors?
Stick with pH-neutral, water-based cleaners made for wood — never vinegar, ammonia, or all-purpose sprays. Bona, Loba, and Osmo are all safe choices that won’t strip the coating or leave streaks.
How do you make engineered timber floors last longer?
Protect high-traffic zones with rugs or runners, fit felt pads under furniture, trim pet claws, and keep humidity steady between 40–60%. A few small habits — done consistently — will keep your floors looking brand new for decades.